.png)
How to add funds
Billing & Wallet
How to Add Funds to Your Shippiz Wallet
Shippiz runs on a pay-as-you-ship wallet, so before you can print your first label you'll need to load some funds. Here's exactly how it works.
Quick summary: Go to Billing, click Add funds, enter an amount, review the processing fee, and confirm. Your balance updates instantly and every label you print draws down from it automatically.
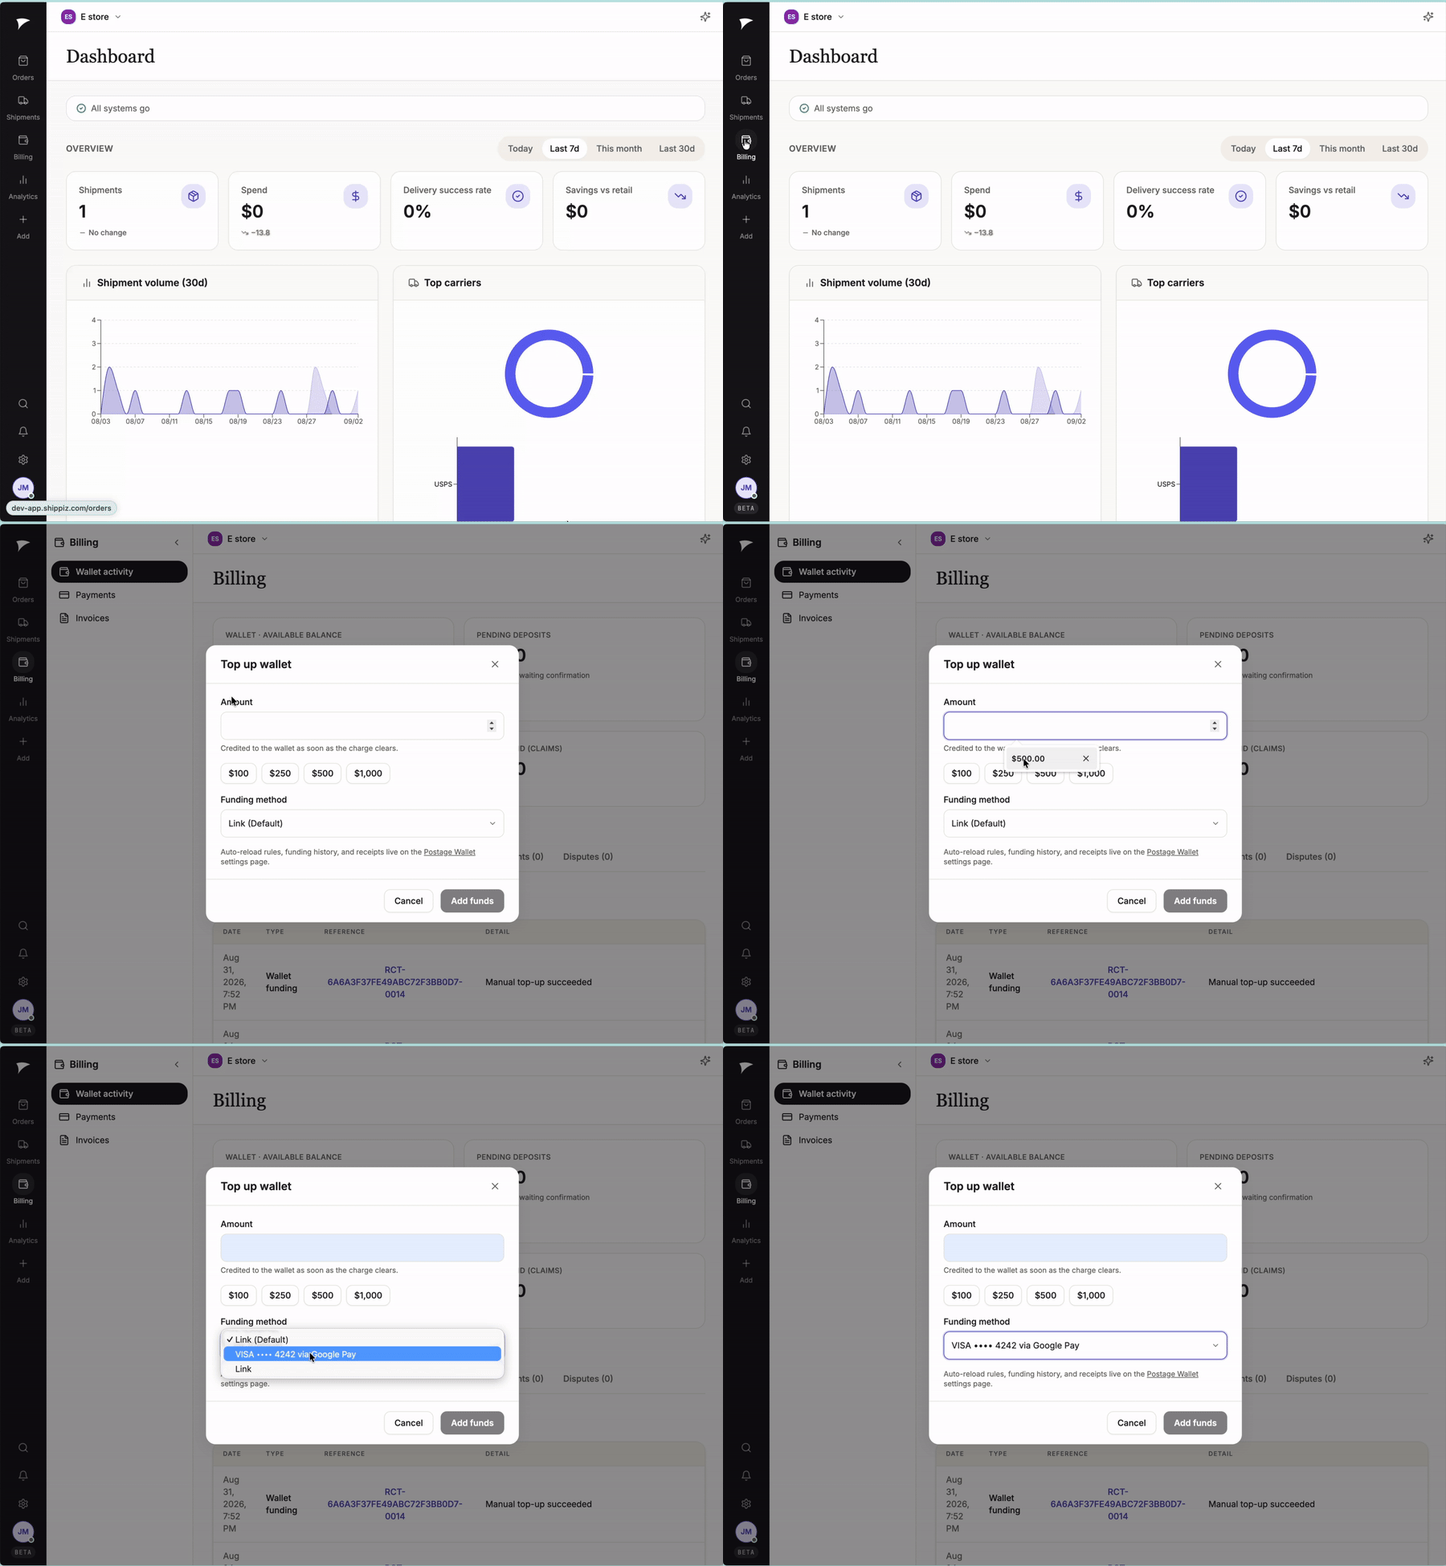
Adding funds to your wallet — takes less than a minute.
Step-by-step
- From any page in Shippiz, go to Billing in the left-hand menu.
- In the Add funds section, click the
Add fundsbutton. - Enter the amount you'd like to load into your wallet.
- Shippiz itemizes the processing fee for that amount, so you'll see exactly what your payment method will be charged before you confirm anything.
- Review the total and click Confirm. Your wallet balance updates immediately, and you're ready to print labels.
Tip: Don't want to think about this again? Turn on Automatic top-ups in Billing settings and Shippiz will recharge your wallet on its own whenever the balance runs low, so labels never stop printing because nobody noticed the balance.
Where to find your funding history
Every deposit and receipt is stored on the Billing page, so you can always look back and see exactly what was charged and when.